Surface and internal quality inspection methods of castings
The inspection of castings mainly includes size inspection, visual inspection of appearance and surface, chemical composition analysis and mechanical performance test. For castings that require more important requirements or are prone to problems in the casting process, non-destructive testing is also required, which can be used for ductile iron castings. Non-destructive testing techniques for quality testing include liquid penetration testing, magnetic particle testing, eddy current testing, radiographic testing, ultrasonic testing, and vibration testing.

Detection of surface and near surface defects of castings
1. Liquid penetration detection
Liquid penetration testing is used to check various opening defects on the surface of castings, such as surface cracks, surface pinholes and other defects that are difficult to find with the naked eye. The commonly used penetration test is color test, which is to wet or spray a colored (usually red) liquid (penetrant) with high penetration ability on the surface of the casting. The penetrant penetrates into the opening defect and quickly wipes off the surface penetrant. Then spray the easy-drying display agent (also called developer) on the surface of the casting. After the penetrant remaining in the opening defect is sucked out, the display agent is dyed, which can reflect the shape and shape of the defect. Size and distribution. It needs to be pointed out that the accuracy of penetrant inspection decreases with the increase of the surface roughness of the inspected material, that is, the lighter the surface, the better the inspection effect. The surface inspection accuracy of the grinding machine is the highest, and even intercrystalline cracks can be detected. In addition to color detection, fluorescent penetrant detection is also a commonly used liquid penetrant detection method. It needs to be equipped with ultraviolet light for irradiation observation, and the detection sensitivity is higher than that of color detection.
2. Eddy current testing
Eddy current testing is suitable for inspecting defects that are generally not more than 6~7mm deep below the surface. Eddy current testing is divided into two types: the placement coil method and the through coil method. : When the test piece is placed near a coil with alternating current, the alternating magnetic field entering the test piece can induce a current (eddy current) flowing in an eddy current direction perpendicular to the excitation magnetic field in the test piece. A magnetic field opposite to the direction of the exciting magnetic field will be generated, which will partially reduce the original magnetic field in the coil, which will cause the change of the coil impedance. If there are defects on the surface of the casting, the electrical characteristics of the eddy current will be distorted, thereby detecting the existence of the defect. The main disadvantage of eddy current testing is that the size and shape of the detected defect cannot be displayed visually, and generally only the surface position and depth of the defect can be determined. In addition, it is not as sensitive as penetrant detection for detecting small opening defects on the surface of the workpiece.
3. Magnetic particle testing
Magnetic particle inspection is suitable for detecting surface defects and defects several millimeters deep below the surface. It requires DC (or AC) magnetization equipment and magnetic powder (or magnetic suspension) to perform detection operations. Magnetization equipment is used to generate a magnetic field on the inner and outer surfaces of the casting, and magnetic powder or magnetic suspension is used to display defects. When a magnetic field is generated within a certain range of the casting, the defects in the magnetized area will produce a leakage magnetic field. When the magnetic powder or suspension is sprinkled, the magnetic powder is attracted, so that the defect can be displayed. The defects displayed in this way are basically the defects that cross the magnetic lines of force, and the long-shaped defects parallel to the magnetic lines of force cannot be displayed. For this reason, the magnetization direction needs to be constantly changed during operation to ensure that various defects in unknown directions can be detected. .
Detection of internal defects in castings
For internal defects, the commonly used non-destructive testing methods are radiographic testing and ultrasonic testing. Among them, radiographic inspection has the best effect. It can obtain intuitive images that reflect the type, shape, size and distribution of internal defects. However, for large castings with large thickness, ultrasonic inspection is very effective, and the location of internal defects can be measured more accurately. , Equivalent size and distribution.
1. Radiographic testing
Radiographic testing generally uses X-rays or γ-rays as the ray source. Therefore, equipment and other ancillary facilities are required to generate rays. When the workpiece is exposed to the ray field, the radiation intensity of the rays will be affected by the internal defects of the casting. The intensity of radiation emitted through the casting varies locally with the size and nature of the defect, forming a radiographic image of the defect, which is visualized and recorded by a radiographic film, or real-time inspection and observation by a fluorescent screen, or by a radiation counter. Among them, the method of developing and recording through radiographic film is the most commonly used method, which is commonly referred to as radiographic inspection. The defect image reflected by radiography is intuitive, and the shape, size, number, plane position and distribution range of the defect are all It can be shown, but the defect depth cannot be reflected generally, and special measures and calculations are needed to determine it. Nowadays, the application of radiographic computer tomography methods appears. Because the equipment is relatively expensive and the use cost is high, it cannot be popularized at present, but this new technology represents the future development direction of high-resolution radiographic detection technology. In addition, the use of a micro-focus X-ray system that approximates a point source can actually eliminate the fuzzy edges produced by larger focus devices and make the image contour clear. The use of digital image system can improve the signal-to-noise ratio of the image and further improve the image clarity.
2. Ultrasonic testing
Ultrasonic testing can also be used to check internal defects. It uses sound beams with high-frequency sound energy to propagate inside the casting. When it encounters internal surfaces or defects, it reflects and finds defects. The magnitude of the reflected sound energy is a function of the directivity and nature of the inner surface or defect and the acoustic impedance of this reflector. Therefore, various defects or sound energy reflected by the inner surface can be used to detect the location, wall thickness or surface of the defect. The depth of the next defect. Ultrasonic testing is a widely used non-destructive testing method. Its main advantages are: high detection sensitivity, which can detect small cracks; it has large penetrating ability and can detect thick section castings. Its main limitations are: it is difficult to explain the reflected waveform of the disconnected defect with complex outline size and poor directivity; for undesirable internal structures, such as grain size, structure, porosity, inclusion content or fine dispersion Precipitates, etc., also hinder the interpretation of the waveform; in addition, the standard test block should be referenced when testing.
Please keep the source and address of this article for reprinting:Surface and internal quality inspection methods of castings
Minghe Die Casting Company are dedicated to manufacture and provide quality and high performance Casting Parts(metal die casting parts range mainly include Thin-Wall Die Casting,Hot Chamber Die Casting,Cold Chamber Die Casting),Round Service(Die Casting Service,Cnc Machining,Mold Making,Surface Treatment).Any custom Aluminum die casting, magnesium or Zamak/zinc die casting and other castings requirements are welcome to contact us.
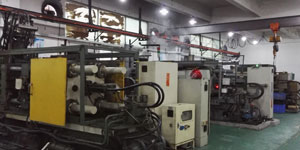
Under the control of ISO9001 and TS 16949,All processes are carried out through hundreds of advanced die casting machines, 5-axis machines, and other facilities, ranging from blasters to Ultra Sonic washing machines.Minghe not only has advanced equipment but also have professional team of experienced engineers,operators and inspectors to make the customer’s design come true.
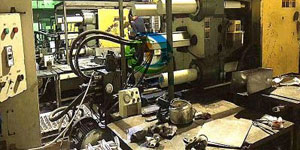
Contract manufacturer of die castings. Capabilities include cold chamber aluminum die casting parts from 0.15 lbs. to 6 lbs., quick change set up, and machining. Value-added services include polishing, vibrating, deburring, shot blasting, painting, plating, coating, assembly, and tooling. Materials worked with include alloys such as 360, 380, 383, and 413.
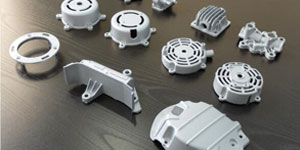
Zinc die casting design assistance/concurrent engineering services. Custom manufacturer of precision zinc die castings. Miniature castings, high pressure die castings, multi-slide mold castings, conventional mold castings, unit die and independent die castings and cavity sealed castings can be manufactured. Castings can be manufactured in lengths and widths up to 24 in. in +/-0.0005 in. tolerance.
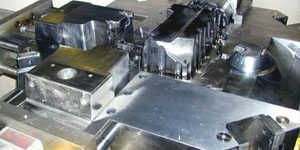
ISO 9001: 2015 certified manufacturer of die cast magnesium, Capabilities include high-pressure magnesium die casting up to 200 ton hot chamber & 3000 ton cold chamber, tooling design, polishing, molding, machining, powder & liquid painting, full QA with CMM capabilities, assembly, packaging & delivery.
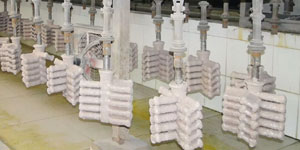
ITAF16949 certified. Additional Casting Service Include investment casting,sand casting,Gravity Casting, Lost Foam Casting,Centrifugal Casting,Vacuum Casting,Permanent Mold Casting,.Capabilities include EDI, engineering assistance, solid modeling and secondary processing.
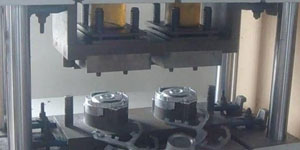
Casting Industries Parts Case Studies for: Cars, Bikes, Aircraft, Musical instruments, Watercraft, Optical devices, Sensors, Models, Electronic devices, Enclosures, Clocks, Machinery, Engines, Furniture, Jewelry, Jigs, Telecom, Lighting, Medical devices, Photographic devices, Robots, Sculptures, Sound equipment, Sporting equipment, Tooling, Toys and more.
What Can we help you do next?
∇ Go To Homepage For Die Casting China
→Casting Parts-Find out what we have done.
→Ralated Tips About Die Casting Services
By Minghe Die Casting Manufacturer |Categories: Helpful Articles |Material Tags: Aluminum Casting, Zinc Casting, Magnesium Casting, Titanium Casting, Stainless Steel Casting, Brass Casting,Bronze Casting,Casting Video,Company History,Aluminum Die Casting |Comments Off

