Temperature Measurement And Control Of Precision Casting
Successful precision casting manufacturers know the importance of process control for the production of high-quality castings. The key variables in the casting process include the mold temperature, the thermal insulation properties of the mold, the cycle time and the method of the operator, etc. However, the most critical process variable is the metal temperature. In the precision casting process, the non-contact measurement of metal temperature has many major difficulties. However, a set of devices developed recently can provide real-time accurate quantitative feedback, revealing potential problems.

The importance of temperature
In the precision casting process, especially in the "equal axis" process, the metal temperature is the dominant factor, and therefore, it also has a direct impact on many quality characteristics. If the measurement and control are improper, the difference in metal temperature will affect the finished casting size, grain size, porosity (surface and internal), mechanical properties, product quality (that is, the tendency of hot tearing), the fullness of thin-walled parts, etc. Make an impact.
Therefore, improving the measurement and control of metal temperature will improve quality and productivity, reduce maintenance and labor costs, and reduce testing costs and liability compensation costs.
Difficulty of temperature measurement
Precision casting, especially precision casting using induction melting equipment, generally uses a certain type of non-contact infrared radiation thermocouple or pyrometer as the primary or secondary means of metal temperature measurement. People who use conventional pyrometers may not understand the potential sources of error in their measurements, but simply pay attention to the "precision" technical conditions of the instrument, and are often misled. These precision specifications are just ideal targets in a laboratory environment. Some conditions in the real world can lead to surprisingly high measurement error values. They include (but are not limited to) the following:
- Unknown/changing emissivity-a variety of alloys, disturbance effects, temperature and wavelength dependence, and changes in composition during processing, etc., all of which play a role in the unpredictability of emissivity.
- Steam emission: For high-pressure melting (close to and above atmospheric pressure), the overflowing gas in the molten pool or crucible will increase or decrease the heat radiation, thus causing errors.
- Observation hole obstacle: For most instruments, any weakening of the signal will cause the temperature indication value to drop; dirt on the observation window affects the accuracy of most pyrometers.
- Observation window glass material: not all glasses have the same transmission properties; some are "gray" colored, while the transmission properties of other glasses change with wavelength. This will cause the conventional pyrometer to fail.
- Calibration: The industry standard is to calibrate once a year. However, the drift and failure of the instrument has its own schedule. The ideal approach is to calibrate all optical components used in the factory (observation glass or observation mirror).
- Instrument calibration: aiming through the lens requires two optical paths to overlap accurately, which will affect all levels of conventional pyrometers.
These difficulties are unique to optical temperature measurement. At the same time, there are also process-related difficulties, which complicate the temperature measurement of any type of instrumentation, including:
- The acceptable range of process variables: Unless the entire melting furnace is in a stable state (usually, this is unrealistic), otherwise, during the casting process, the temperature will have a range, and it is very important that this temperature range Must be able to guarantee the quality of the product.
- Signal processing capability: Every analog to digital or digital to analog conversion between measuring instruments and control equipment is a potential source of error, and the wide analog range leads to a lack of precision.
- Melting technology: Poor melting technology can cause transitional boiling of high vapor pressure elements, disturbance on the surface of the molten pool or formation of reaction products, all of which will cause errors in conventional pyrometers.
- Matching among ingots, crucibles and coils: For the characteristics of the melting cycle, these three components of the melting system are all important. Improper matching will cause slow and uneven melting, local overheating or sputtering. These are also sources of errors in conventional pyrometers.
High temperature spectrometer to solve the problem
High temperature measurement technology has its inherent advantages: no pollution, no sensor poisoning when removed; easy installation and use; continuous measurement can be performed; no consumable materials; catastrophic failure (loss of measurement function) is extremely rare. Now, advances in pyrometry science have solved various problems associated with the real world in use. The pyrospectrometer is a brand-new instrument, it is an expert system type multi-wavelength pyrometer, has good ability in solving these problems.
In addition to providing excellent accuracy in the real world, the high-temperature energy spectrometer has many other advantages: it can provide real-time readings of the quality and tolerances (that is, the degree of uncertainty during measurement) during each measurement; it can also provide signal strength , The comparison between the target and the ideal target under the same temperature and state. These two functions can provide valuable information about the raw material and process status, help to ensure the correct composition of the alloy and show whether the alloy material is boiled and evaporated. Obviously, users who have mastered this information can also apply it to some more advanced fields.
In a variety of different applications, high temperature spectrometers have solved the difficulty of non-contact temperature measurement.
- Emissivity: Emissivity will change with each batch of material samples, which is a correlation between theoretical calculations in high temperature measurement and material behavior in the real world. For the precision casting industry, the emissivity of metals varies greatly. For any sample, its emissivity depends on the historical conditions of composition, mechanical and thermal properties, the wavelength at which the measurement is made, and the temperature itself. Analysts believe that the relative error of temperature is proportional to the relative error of emissivity, namely:
- Among them: T is the temperature, is the emissivity, ΔT and Δ are their respective errors. For precision casting, the emissivity value of liquid metal is often in the range of 0.15 to 0.30, and the small emissivity value in the denominator will have a large impact on the temperature error.
A foundry shop may provide parts made of 20 or 30 different alloying elements. The quantification of the impact of a small amount of change in alloy materials on the emissivity of metals has not been carried out on a large scale. Therefore, there is no manual for the emissivity of precision casting alloys. . The similarity of the composition cannot be used to estimate the emissivity, a small amount of additives can greatly change the emissivity. As shown in Figure 1, the emissivity of the two alloys shown in the figure, the difference in composition is a total of 2% atomic weight of the added element. The resulting difference in emissivity causes a pyrometer "calibrated" according to an alloy to produce a reading error of several hundred degrees. Large errors will cause process chaos and shut down the smelting furnace for several days.
The pyrospectrometer is a pyrometer that does not need to prepare any information in advance and can perform accurate measurements, regardless of the emissivity, and is not restricted by the environment. It shows the temperature and emissivity recorded by the FAR high temperature spectrometer for monitoring nickel-based precision casting alloys. It can be seen from the figure that each change of the power setting value causes a rapid spike-like increase in the emissivity, which is caused by the disturbance of the electromagnetic stirring of the molten material, which will strengthen the emissivity. The movement of the liquid forms a small cavity, which increases absorption and emission due to the effect of multiple reflections. Secondly, when the melt cools, the emissivity undergoes a step-like change: around 1:15, the incidence is reduced by more than 10%, from 0.245 to 0.220.
This effect is consistent with the boiling and evaporation of alloy materials. When this change occurs, the temperature remains constant. Finally, the melt freezes and the emissivity changes drastically, from 0.22 to 0.60. The slowly decreasing temperature and the simultaneous slowly increasing emissivity indicate that the process of metal hardening undergoes a slurry state, rather than a sudden change in phase like water turns into ice. Figure 3 shows the same process as Figure 2, but this time the output of a conventional pyrometer has been added. In addition to the large temperature error, it should be noted that during the power-off cooling process, conventional pyrometers cannot measure. Between 1:35 and 1:50, the pyrometer reported an increase in temperature. This is a false condition, caused by the increase in emissivity during the cooling process of the metal.
In actual operation, the huge temperature error caused by incorrect emissivity not only affects product quality, but also has some obvious consequences such as waste of electricity, prolonged cycle time, and increased wear of refractory materials.The two trace curves are the temperature and emissivity in four consecutive casting cycles measured by a pyrometer. The peak temperature is not without Particularly repeatable, you can see that there are many fairly large spikes in the emissivity in Figure 4, indicating that there is a particularly large disturbance. The spike is caused by severe electromagnetic stirring.
The process is as follows: the disturbance in the melt strengthens the emissivity, and conventional pyrometers interpret this as an over-temperature value; then, as a reaction to the phenomenon, the controller cuts off the power; the power cuts off After that, the disturbance subsided, and then, the conventional pyrometer detected the condition of too low temperature, and the power was turned on again. The resulting current surge stirred the molten material violently, and the periodic cycle began, and the severe disturbance caused the corrosion of refractory materials. As a result, inclusions are generated in the product.
Please keep the source and address of this article for reprinting:Temperature Measurement And Control Of Precision Casting
Minghe Die Casting Company are dedicated to manufacture and provide quality and high performance Casting Parts(metal die casting parts range mainly include Thin-Wall Die Casting,Hot Chamber Die Casting,Cold Chamber Die Casting),Round Service(Die Casting Service,Cnc Machining,Mold Making,Surface Treatment).Any custom Aluminum die casting, magnesium or Zamak/zinc die casting and other castings requirements are welcome to contact us.
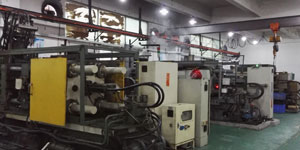
Under the control of ISO9001 and TS 16949,All processes are carried out through hundreds of advanced die casting machines, 5-axis machines, and other facilities, ranging from blasters to Ultra Sonic washing machines.Minghe not only has advanced equipment but also have professional team of experienced engineers,operators and inspectors to make the customer’s design come true.
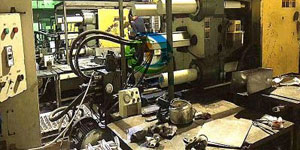
Contract manufacturer of die castings. Capabilities include cold chamber aluminum die casting parts from 0.15 lbs. to 6 lbs., quick change set up, and machining. Value-added services include polishing, vibrating, deburring, shot blasting, painting, plating, coating, assembly, and tooling. Materials worked with include alloys such as 360, 380, 383, and 413.
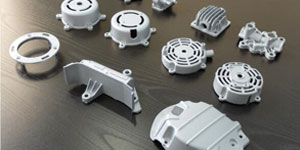
Zinc die casting design assistance/concurrent engineering services. Custom manufacturer of precision zinc die castings. Miniature castings, high pressure die castings, multi-slide mold castings, conventional mold castings, unit die and independent die castings and cavity sealed castings can be manufactured. Castings can be manufactured in lengths and widths up to 24 in. in +/-0.0005 in. tolerance.
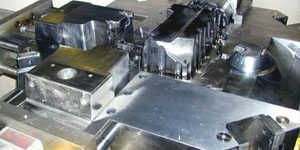
ISO 9001: 2015 certified manufacturer of die cast magnesium, Capabilities include high-pressure magnesium die casting up to 200 ton hot chamber & 3000 ton cold chamber, tooling design, polishing, molding, machining, powder & liquid painting, full QA with CMM capabilities, assembly, packaging & delivery.
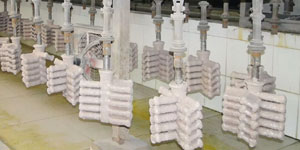
ITAF16949 certified. Additional Casting Service Include investment casting,sand casting,Gravity Casting, Lost Foam Casting,Centrifugal Casting,Vacuum Casting,Permanent Mold Casting,.Capabilities include EDI, engineering assistance, solid modeling and secondary processing.
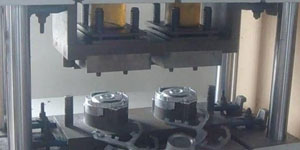
Casting Industries Parts Case Studies for: Cars, Bikes, Aircraft, Musical instruments, Watercraft, Optical devices, Sensors, Models, Electronic devices, Enclosures, Clocks, Machinery, Engines, Furniture, Jewelry, Jigs, Telecom, Lighting, Medical devices, Photographic devices, Robots, Sculptures, Sound equipment, Sporting equipment, Tooling, Toys and more.
What Can we help you do next?
∇ Go To Homepage For Die Casting China
→Casting Parts-Find out what we have done.
→Ralated Tips About Die Casting Services
By Minghe Die Casting Manufacturer |Categories: Helpful Articles |Material Tags: Aluminum Casting, Zinc Casting, Magnesium Casting, Titanium Casting, Stainless Steel Casting, Brass Casting,Bronze Casting,Casting Video,Company History,Aluminum Die Casting |Comments Off

